All about AWeber’s new Campaigns feature
A while ago, AWeber rolled out a new beta feature called Campaigns.
The introduction of Campaigns is AWeber’s first step into more advanced email automation. The aim is to “send the right message to the right person at the right time”.
Sounds like you’ve heard that somewhere before?
Well, that’s because AW Pro Tools was created with exactly this goal in mind.
Send your subscribers targeted, timely relevant messages based on the actions they have taken and interests they have shown.
And do it automatically.
This behavior based automation and segmentation is the key to successful email marketing campaigns.
So if you use AWeber this is a positive move.
Now, what exactly can you do with Campaigns?
We’ll get to that… but first let’s talk about AWeber’s Legacy Follow Up Series.
If you’ve been using AWeber for any length of time you’ll know about their Legacy Follow Up Series aka autoresponder sequence.
It’s pretty simple.
People sign up to your list and automatically get emails you created on a timed schedule that you determine.
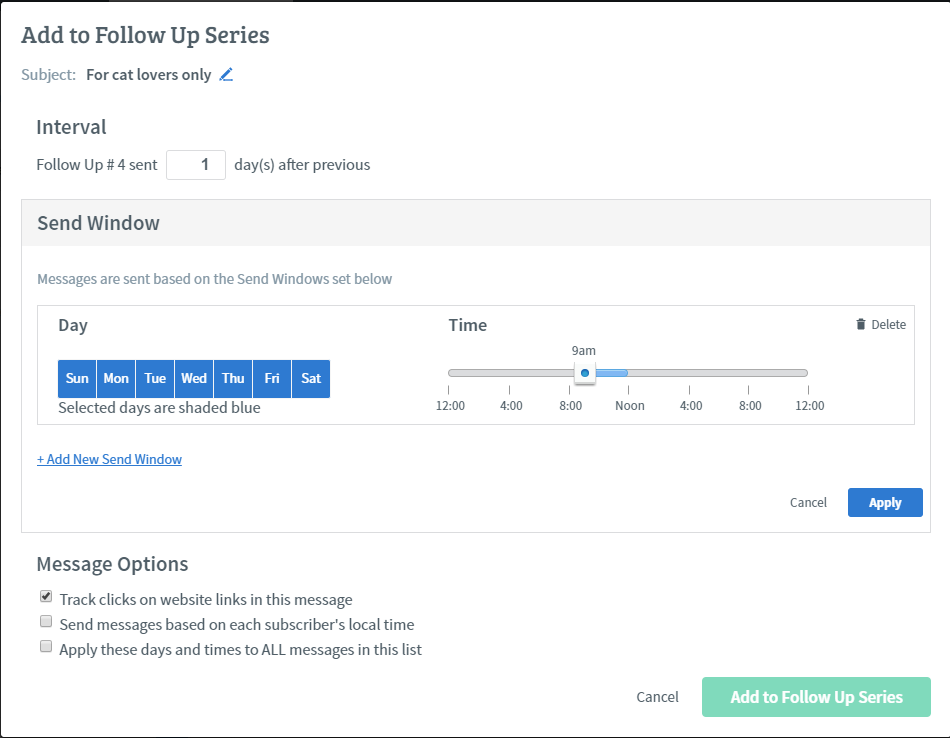
You do have the option to control what days and times the follow up emails are sent, but for the most part it’s very static.
Now let’s say you sell an ecourse that helps programmers and software developers get hired, improve their careers and make more money.
You do that by offering them a free 7 day ecourse before pitching them on your paid course.
If you were doing this with Legacy Follow Ups you’d create the sequence and set it up so that the emails for the free course go out daily.
The problem with that is you’d have no idea of knowing who on your list completed the free ecourse. Or what stage of the follow up they’ve reached without manually checking in the subscriber history.
Meaning if you wanted to send people that completed the free course a coupon for the premium version… you’d be faced with a serious headache.
But with Campaigns, things start to get interesting.
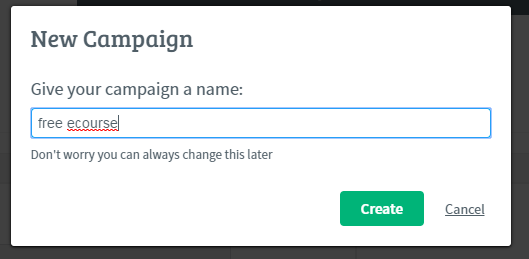
The first step is to create a campaign by giving it a name.
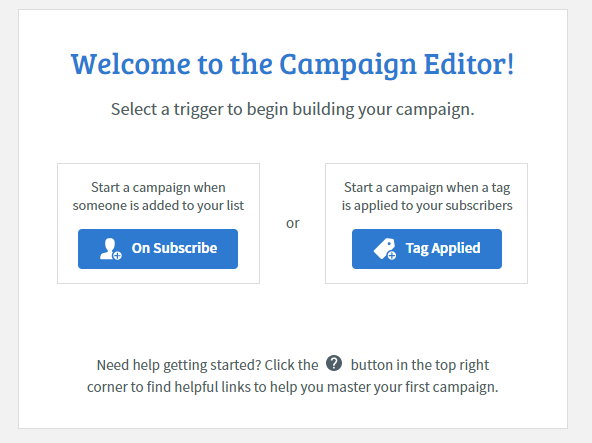
After this you’ll be given the option of selecting a trigger.
Just like in AW Pro Tools, a trigger is an action that activates the campaign.
In this case you have two choices: On Subscribe or Tag Applied.
Now would be a good point to talk a little about Tags.
“Tagging” is a general term used for capturing information about your subscriber.
If that sounds familiar, it’s because custom fields in AWeber can be used to do the same thing.
But in the context of Campaigns, it’s very important to understand that applying a Tag is NOT the same as adding information to a custom field.
For now, that’s the most important thing you to remember about tags. We’ll talk more about them later and how you can use them.
Let’s continue with setting up the Campaign.
Select On Subscribe as the trigger.
That means when people subscribe to your list they will be added to the Campaign.
To the right, you’ll notice you can also apply some filters to control exactly which subscribers get added to the Campaign.
This includes options like Source, Country or Ad Tracking.
But it also includes the option to use custom fields as a filter.
This can be very handy if, for example, you want to ensure only people interested in particular courses or products receive the Campaign.
For now, leave it as All subscribers.
To the left, you’ll see 3 different options you can use to create your Campaign.
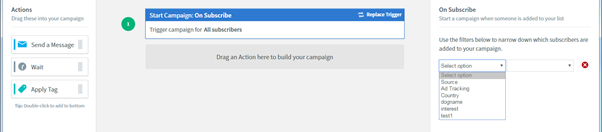
You can send a message, wait a set time (minutes, hours, days, even months) and you can apply or remove Tags. (Remember, Tags are different from custom fields.)
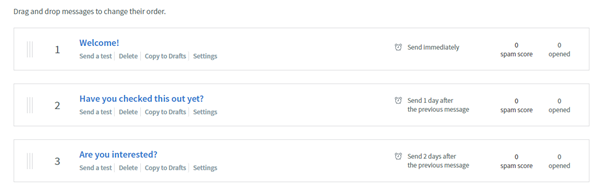
So you’d create your free ecourse sequence very similarly to if you were creating it in Legacy Follow Ups.
Add the different messages, spaced with 1 day waiting times between each message like below.
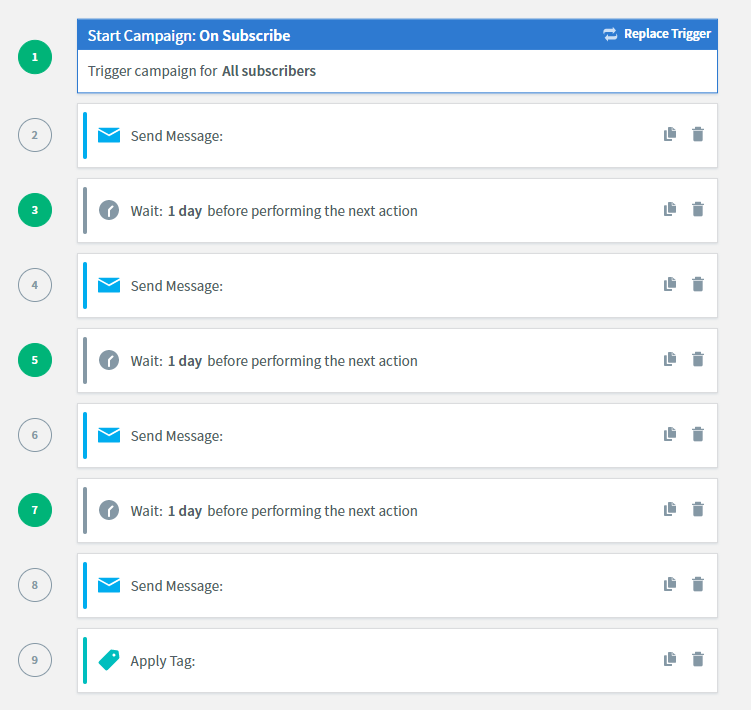
Now, what separates Campaigns from Legacy Follow Ups is the last step where we use the “Apply Tag” action.
Here we can add a Tag as “completed free course”.
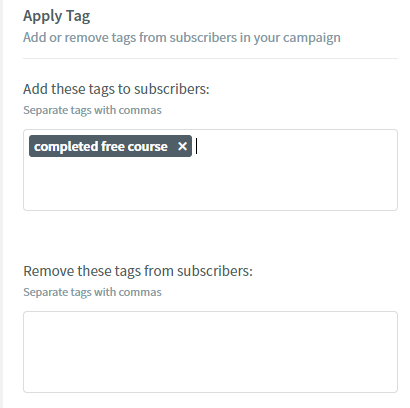
You can now use this Tag to trigger another Campaign where you offer a coupon to the full version of your course.
So instead of using On Subscribe as your trigger for the second Campaign, you would select “Tag Applied” and add “completed free course”.
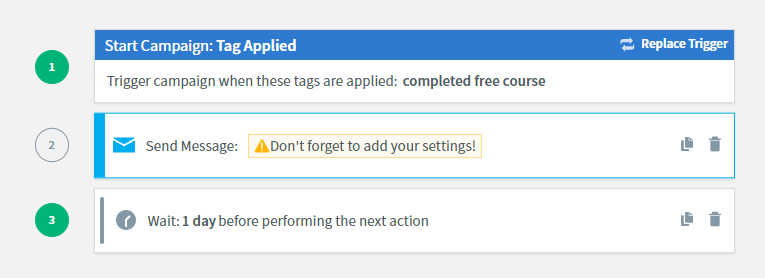
That means, when people complete the sequence and the tag gets applied that they’ve completed the course, this Campaign gets triggered that automatically sends your prospects the coupon offer sequence.
This is something that you would not have been able to do using Legacy Follow Ups.
Now, with this beta version of Campaigns the “Apply Tag” action is pretty limited.
You can only apply or remove tags based on when messages are sent or a certain wait period has passed.
But wouldn’t it be more powerful if you could apply/remove tags (and hence trigger Campaigns) based on other actions your subscribers take?
Like clicking a link or visiting a particular page?
That’s where AW Pro Tools can help.
With the API integration available, you can now add and remove tags using any of the AW Pro Tools triggers.
So that means, whenever a subscriber clicks on a Smart Link, watches a certain portion of a video or even simply opens an email you can apply (or remove) a tag that will trigger a Campaign.
Here’s how to set up a simple automation that can help you build customer loyalty but also help with segmenting your list in the future.
Let’s say after making a purchase, your buyers are redirected to a thank you page.
You’ll be creating an automation that not only starts your buyers welcome Campaign but also adds custom field information that shows that your subscriber is now a buyer.
You’ll first create your buyers welcome Campaign where the trigger is “Tag Applied”. The tag will be “purchased product”.
Next, you’ll create a custom field (link to custom field article) for your list called “status”. This is what will be used to track whether or not the subscriber is a buyer or a prospect.
With these things in place, head over to AW Pro Tools and create a new automation.
The trigger will be “Page Visit” so that it’s activated when subscribers hit your product Thank You page.
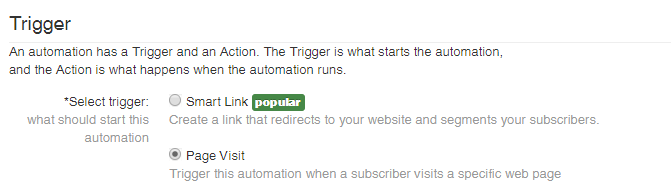
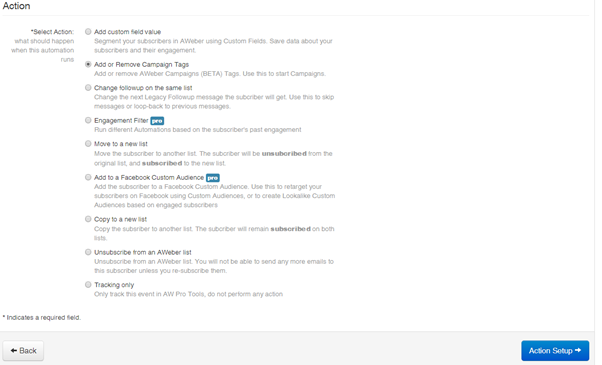
On step 2, enter the URL for your Thank You page and move on to step 3 where you select the action to take when the automation is triggered.
Here, select “Add or Remove Campaign Tags” and move on to Action Setup.
Now, this is where things start to get a little more advanced… but still easy to execute.
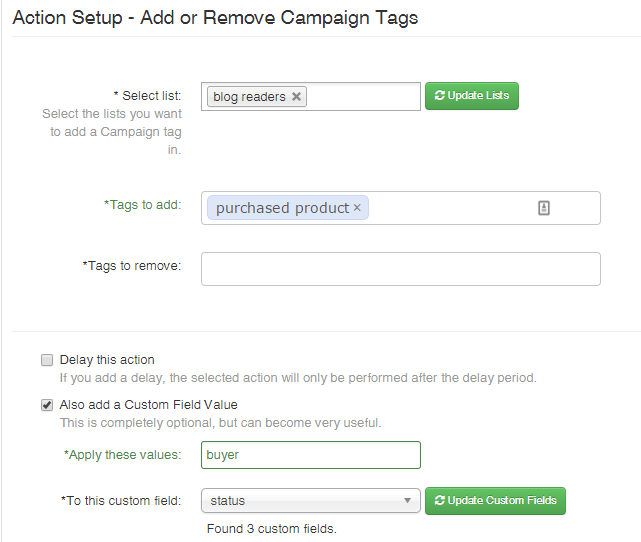
Select the list that you’re using and the tag to add, “purchased product”.
When a subscriber visits your Thank You page, AW Pro Tools works in the background to apply this tag to them.
Then because your buyers welcome Campaign is set up to be triggered whenever this tag is applied, the buyer will start getting the emails from that Campaign automatically.
Sounds good right?
The next step is to “tag” this subscriber as a buyer. To do this you use the “status” custom field.
This will be useful going forward because you will now be able to use this custom field to segment your buyers from non-buyers. So if you wanted to send a special offer to people that have bought to buy a complimentary product you can easily create a segment for the mailing.
To do this, simply toggle on the “Also add a Custom Field Value” option below the main Action Setup options. Then enter the value you want to add (buyer) and the custom field it will be added to.
Hit finish and you’ll almost be ready to go.
You can rename the automation (which is highly recommended to make it easier to keep track of your automations) and copy the HTML snippet that you need to add to your Thank You page that will trigger the automation.
That’s it!
You’ve now set up a single automation that will trigger a buyers welcome Campaign and add important subscriber information to a custom field.
Without you lifting a finger.
And this is a just very simple example of how you can use AW Pro Tools automations and AWeber Campaigns.
As you can imagine, the combination of different triggers, actions, applying tags, integration with Facebook and webinar platforms… the possibilities are endless. And can lead to creating some very complex automations that can save you hours of managing your email and automating more of your business.
To learn more about the powerful automation tools available with AW Pro Tools, sign up for a free 14 day trial here.