If you target subscribers from different countries (or even just different US states), it’s very useful to have ready-made segments based on the subscriber’s location. With location-segments you can:
- Easily send holiday greeting broadcasts for specific countries
- Offer timely special rates on country-specific holidays, like independence days, memorial days, or bank holidays
- Send subscribers campaigns in their own native language
- Use local data like weather, political trends, and competitor activity in each country / state to offer hyper-relevant information and offers
In the US, you can dive even deeper and use states, cities, and even area codes to create super-targeted segments.
When subscribers opt-in to your lists, AWeber figures out their location by looking at their IP address. The level of detail varies, but in most cases you’ll get at least the subscriber’s country.
Tags are the best way to create segments in AWeber — simply search by one or more tags, and save the search as a segment.
By using some of AW Pro Tools latest features, you can create a fully automated segment-creating machine based on the location of subscribers. It only takes a few minutes to setup.
Here’s the full step-by-step guide:
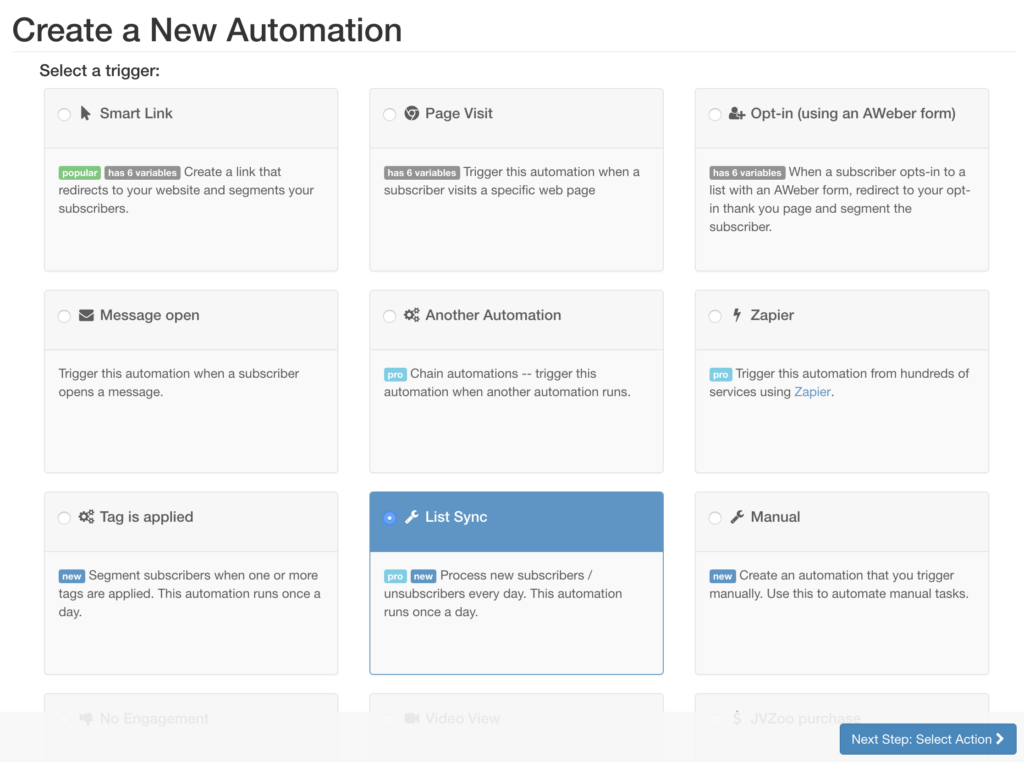
Step 1 – Create a new List Sync automation
The “List Sync” trigger is one of the coolest new features we’ve added in 2018. It runs every day on subscribers that opted-in or opted-out on the previous day.
After you login to your AW Pro Tools account, click the “Create an Automation” button to create a new automation.
In the next screen, select “List Sync” as the trigger
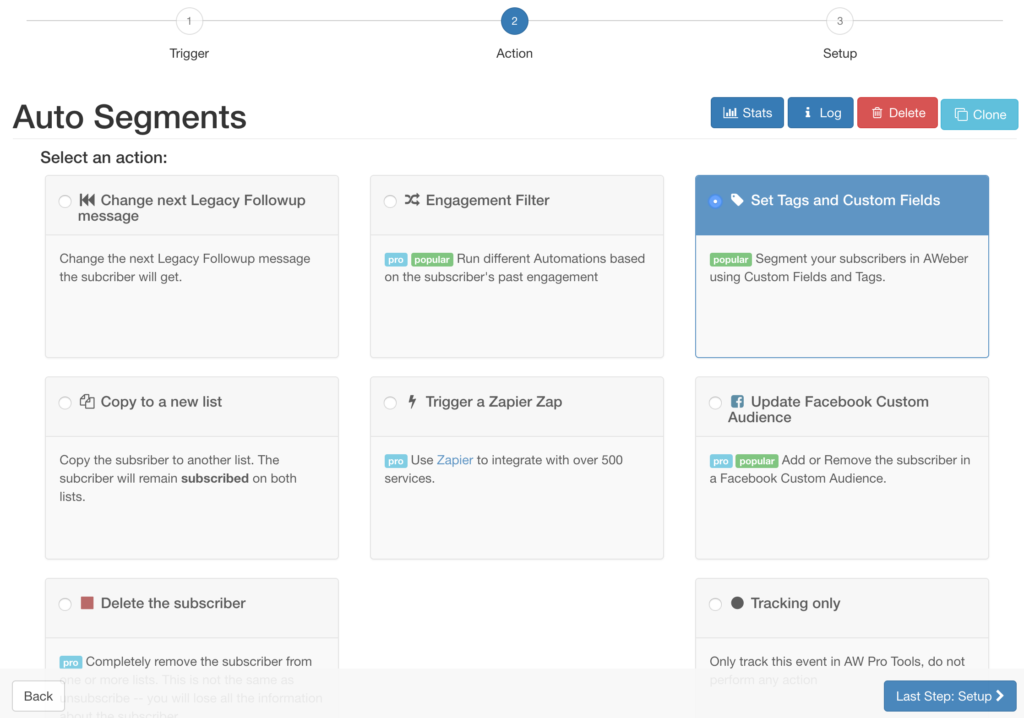
Step 2 – Select the “Tag” Action
We’ll be creating segments based on tags, so in the next screen select “Set Tags and Custom Fields” as the action.
Step 3 – Set the list for the List Sync Trigger
Select the list you want to auto-segment with this automation.
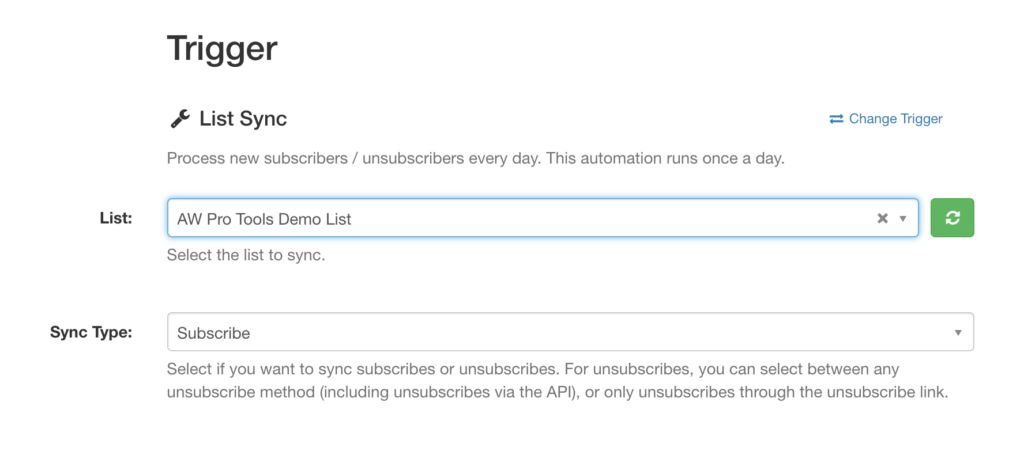
(To create an auto-segmenting automations for multiple lists, finish this automation, duplicate it, and just change the list the duplicate automation will run on.)
Step 4 – Setup the Dynamic Tags
This is where the magic happens — in the same screen, under “Add Tags” type in:
{country}
{country} is a special code that will be replaced by the subscriber’s country. You can read more about dynamic tags in this blog post.

You can also add {region} to add another tag based on the subscriber’s region (as shown in the screenshot above) – in the US, the region is the state. If the region wasn’t identified, it will just be ignored (same for the country — but in most cases, the country is identified for all subscribers).
Now just save the automation.
Step 5 – Reap the Benefits!
Once you save the automation, it will run every day. You don’t have to do anything else – your subscribers will be magically segmented by their location, daily. All that’s left to do now is use these new segments to fine-tune your funnel.
BONUS — Run this automation subscribers that are already on your list
This automation will run every day on new subscribers that are added to your list.
If you want to add the location tags to subscribers that are already on your list, you can export the subscribers from AWeber to a CSV file, and then use the Run on CSV feature to set the location tags on all your current subscribers. Click here to read a blog post explaining how to do that.