I recently started noticing that some email messages look better than others in my phone’s notifications.
Usually, mobile notifications show the message’s subject and a small preview of the message body. In most cases, that preview is just the first few lines of the message body, which isn’t really optimized to get subscribers to open the message.
But recently, I started seeing notifications that show the subject line, followed by what appeared to be a second subject line… When I opened those messages, that “sub-subject line” wasn’t part of the message body.
I was intrigued. And I love challenges.
Earlier today, I was using AWeber‘s awesome new Drag and Drop builder. Besides the modern UI, I noticed something I hadn’t seen before:
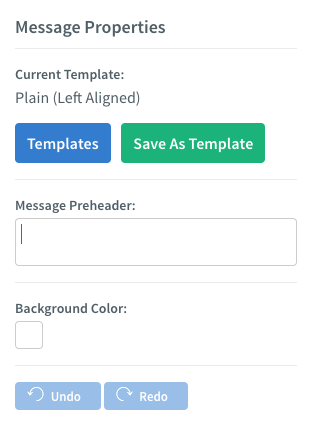
I wondered if that Message Preheader is that magical “second subject line” — and turns out, it is!
Well, kinda.
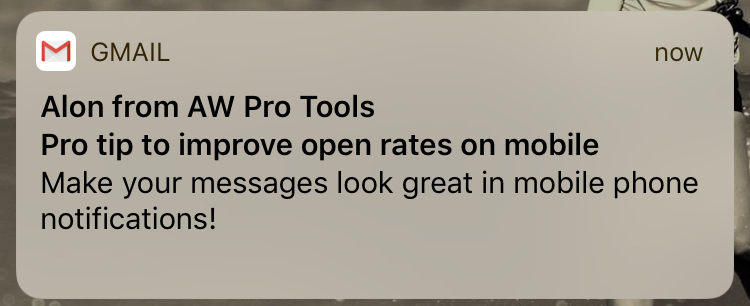
I use the Gmail app on my iPhone (yes, I use an iPhone — deal with it, Android people!). When I sent a test message with a Message Preheader text, it didn’t show as I expected it to show. Here’s how the notification looked like:
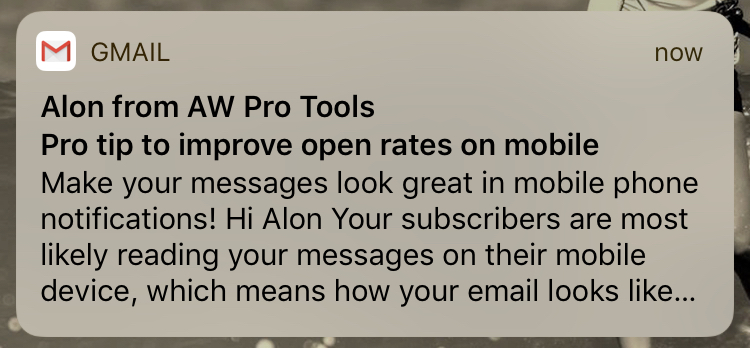
“Pro tip to improve open rates on mobile” was my subject line, and “Make your message look great in mobile phone notifications” was my Message Preheader. But the rest of the text in the preview? That’s my message body. No bueno.
But – like I said, I love challenges. I started digging into the source code of messages that did show up nicely in my phone’s notifications, and figured it out – and now I’m sharing what I learned with you, so your messages can also look awesome in your subscribers’ mobile notifications.
This is the end result, with the same message as the one above:
MUCH better, right?
Want to learn how do this? Here’s the step by step:
Step 1 — Opt-in to AWeber’s new Drag and Drop email builder
Just create a new message (or open a draft) and you’ll see this bar at the top:

Click the blue “TRY IT OUT” button to opt-in to the new Drag and Drop email builder.
Step 2 — Create your awesome message
Write your subject line and your message. You can use AWeber’s library of templates, or design your email from scratch. Personally, I like to send simple, short emails to my subscribers – but it’s really up to you how you design your email messages.
Step 3 — Add your Message Preheader
At the right-hand side of the new drag & drop editor, you’ll see this:
Enter your message preheader. It should be short and sweet, and complement your subject line. Remember — its purpose is to make your subscriber swipe that email notification and to open your message.
Step 4 — Add the magic HTML code
Unfortunately, if you skip this last important step, in some cases the first few lines of the message body will still show in the message preview — so pay close attention.
Click the first part of your message – that’s the first block of text in the message editor. Once you do that, you’ll see the buttons in the toolbar get enabled.
Now click the right-most button that will show you the HTML source of your message. Here’s a quick animated GIF that shows how to do this:
Copy this block of HTML code:
<div style="display: none; max-height: 0px; overflow: hidden;"> </div> </div>
And paste it at the top of the message’s HTML.
Don’t worry — this entire section of HTML will be completely hidden from the message body when it’s read by your subscribers. It’s just a little trick to make sure that only the Message Preheader is shown in the mobile notification below to the subject line.
Now click “OK” to save the updated HTML — and send yourself a test message.
That’s it!
Your message will have an awesome, professional-looking, swipe-enticing, mobile notification preview!